

Sensing Presence: A Live Music Video Gallery Prototype
- Alexandros Barbayianis

- Jul 29, 2025
- 2 min read
Concept
This project is a small-scale prototype of an idea that keeps coming back to me: a live music video as gallery installation. The idea is simple: when you're present, the experience continues — lights, sound, narrative. When you're absent, it stops. This interactivity encourages users to keep moving through the space and stay engaged until they reach the end of the story.
Inputs & Outputs
Inputs:
PIR motion sensor (detects presence/movement)
Ultrasonic sensor (measures distance)
Outputs:
15 blue LEDs (motion-controlled)
Speaker (distance-controlled tone generation)
How It Works
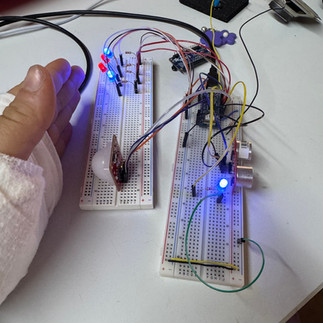
The PIR motion sensor is connected to 15 blue LEDs.
When motion is detected, the LEDs turn on and stay lit for a few seconds.
If no motion is detected, they turn off — pausing the visual part of the experience.
The ultrasonic sensor triggers the speaker.
The tone pitch varies depending on how close or far the viewer is, adding a responsive sound layer.
Arduino Code Screenshots


What I Learned
Once a pin is declared in Arduino, the entire corresponding row on the breadboard gets powered — not just one hole! This small misunderstanding caused major confusion when I tried to add more LEDs.
Managing 15 LEDs with one motion sensor was more of a physical wiring challenge than a coding one. At one point, I half-jokingly thought I needed a magnifying glass to wire them all.
Breadboards aren’t great for transport. Moving it between locations with so many wires and components was a nightmare — I even had to re-solder the speaker wire after it snapped.
Debugging code is 90% reading line by line and understanding syntax. HUGE shout out to Jess and Brian who helped me make sense of it all.
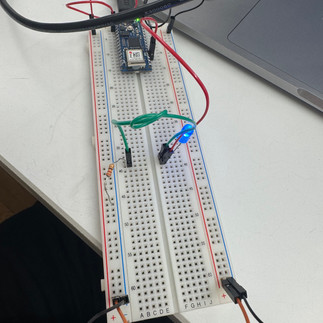
Documentation from Model 1 to 10


Challenges
Physical layout and stability of the circuit.
Debugging the logic once the components were housed inside a makeshift gallery/maze space (built using reused materials from MFTA).
Understanding how the PIR and sonar sensors would behave in a partially enclosed environment.
Next Steps
Replace the basic speaker with a sound board for better quality audio output.
Use addressable LEDs to create richer light effects and reduce pin count.
Build a scaled-up prototype that includes more intentional physical pathways and narrative design.
Eventually: a full interactive music video installation experience.
Future goal: Adafruit sound board for higher-quality audio
Something Worth Sharing
I understood maybe 5% of the code at first. But by combining labs, Googling datasheets, and working with friends, I built something meaningful. The best advice I received: Take it line by line. Syntax by syntax.
Documentation Videos
Resources & References
Here are the tutorials, guides, and tools that helped me bring this project to life:
Breadboarding Basics: Breadboard Layouts – ITP
PIR Motion Sensor Guides: SparkFun OpenPIR Hookup GuideAdafruit PIR Motion Sensor Overview
Arduino Function References:tone() Function – Arduino DocsDigital Input & Output Lab – ITP
Audio Expansion Ideas: Adafruit Audio FX Sound Board – Product PageTriggering Audio with the Adafruit FX Board
Slide Reference: Class Slide Example (Google Slides)


Comments